This guide shows how to get a first DMX output from an Open DMX USB (70303) using QLC+, a free, open-source lighting control application for Windows, macOS and Linux. By the end you will have the interface enabled as an output in QLC+ and be moving channel faders to confirm your fixtures respond.
What you need
- An Open DMX USB (70303) and a USB cable (Type-B connector on the device end).
- QLC+ installed on your computer. Download it from qlcplus.org.
- At least one DMX fixture connected to the 5-pin DMX output, with its DMX address set so you know which channels to move.
Step 1: Connect the Open DMX USB to your computer
Plug the Open DMX USB into your computer with the USB cable, and connect your fixture to the 5-pin DMX output.
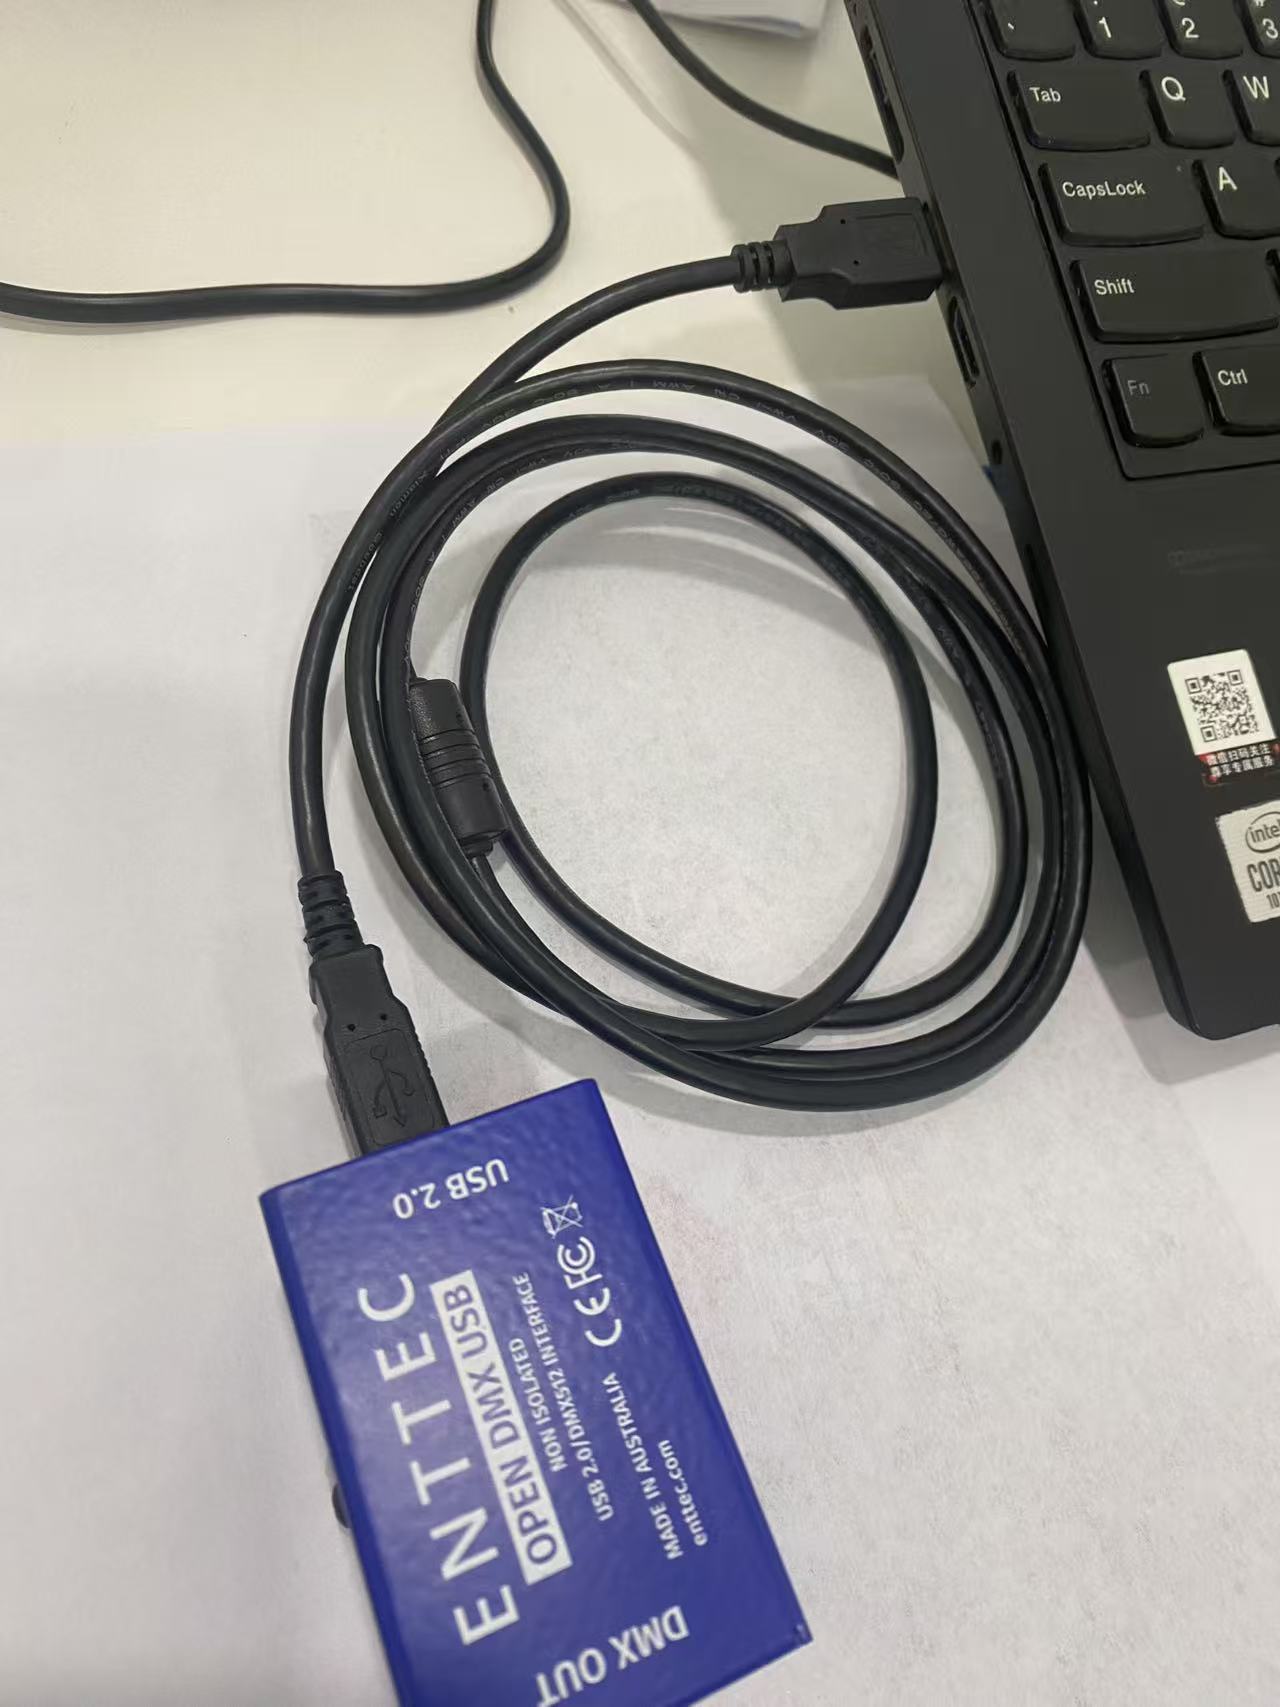
Step 2: Open the Inputs/Outputs tab in QLC+
Start QLC+ and switch to the Inputs/Outputs tab. This tab lists every DMX interface QLC+ can see on your system.
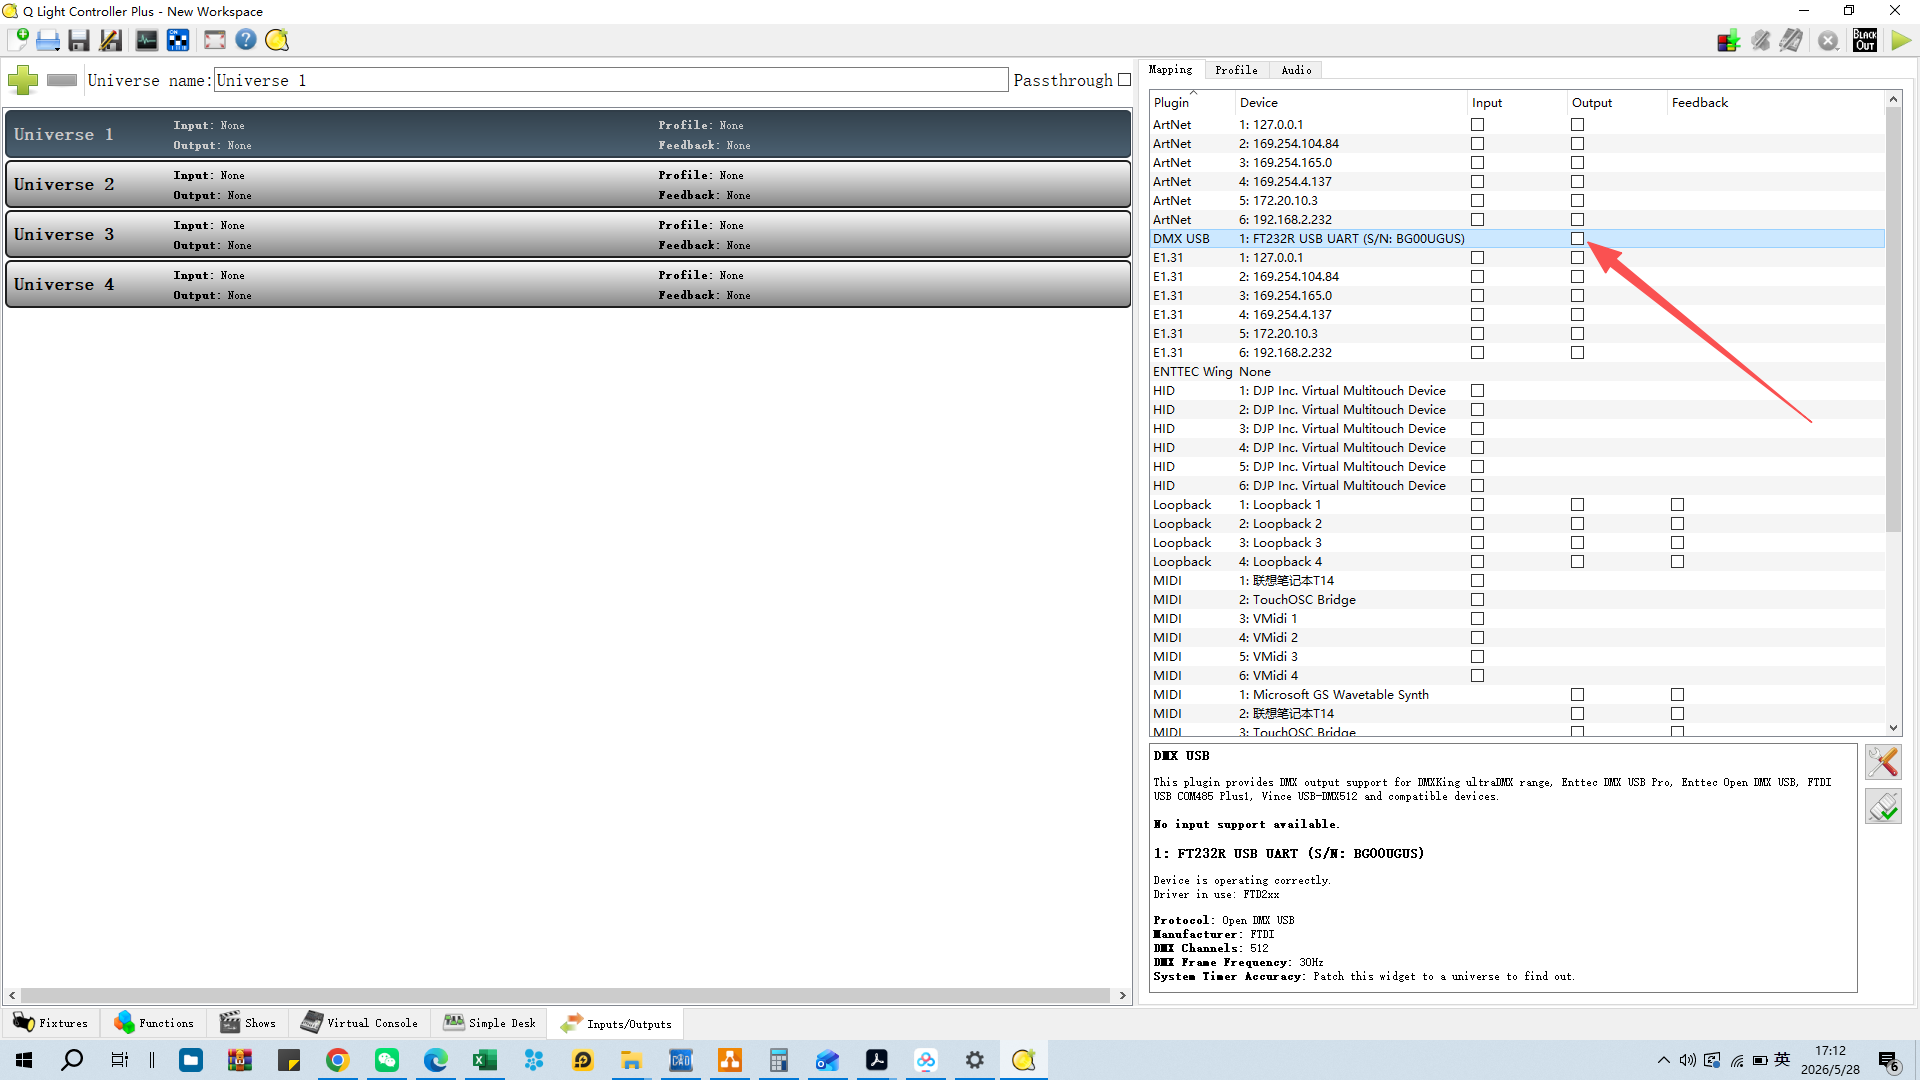
Step 3: Enable the output
Find the DMX USB entry for your Open DMX USB in the device list and tick its Output checkbox for Universe 1. QLC+ will now send that universe (up to 512 channels) out through the interface.
Step 4: Test with Simple Desk
Switch to the Simple Desk tab and move the channel faders that match your fixture's DMX address. Your lights should respond immediately. This is also the quickest way to verify a DMX output is working before you start patching fixtures and building scenes.
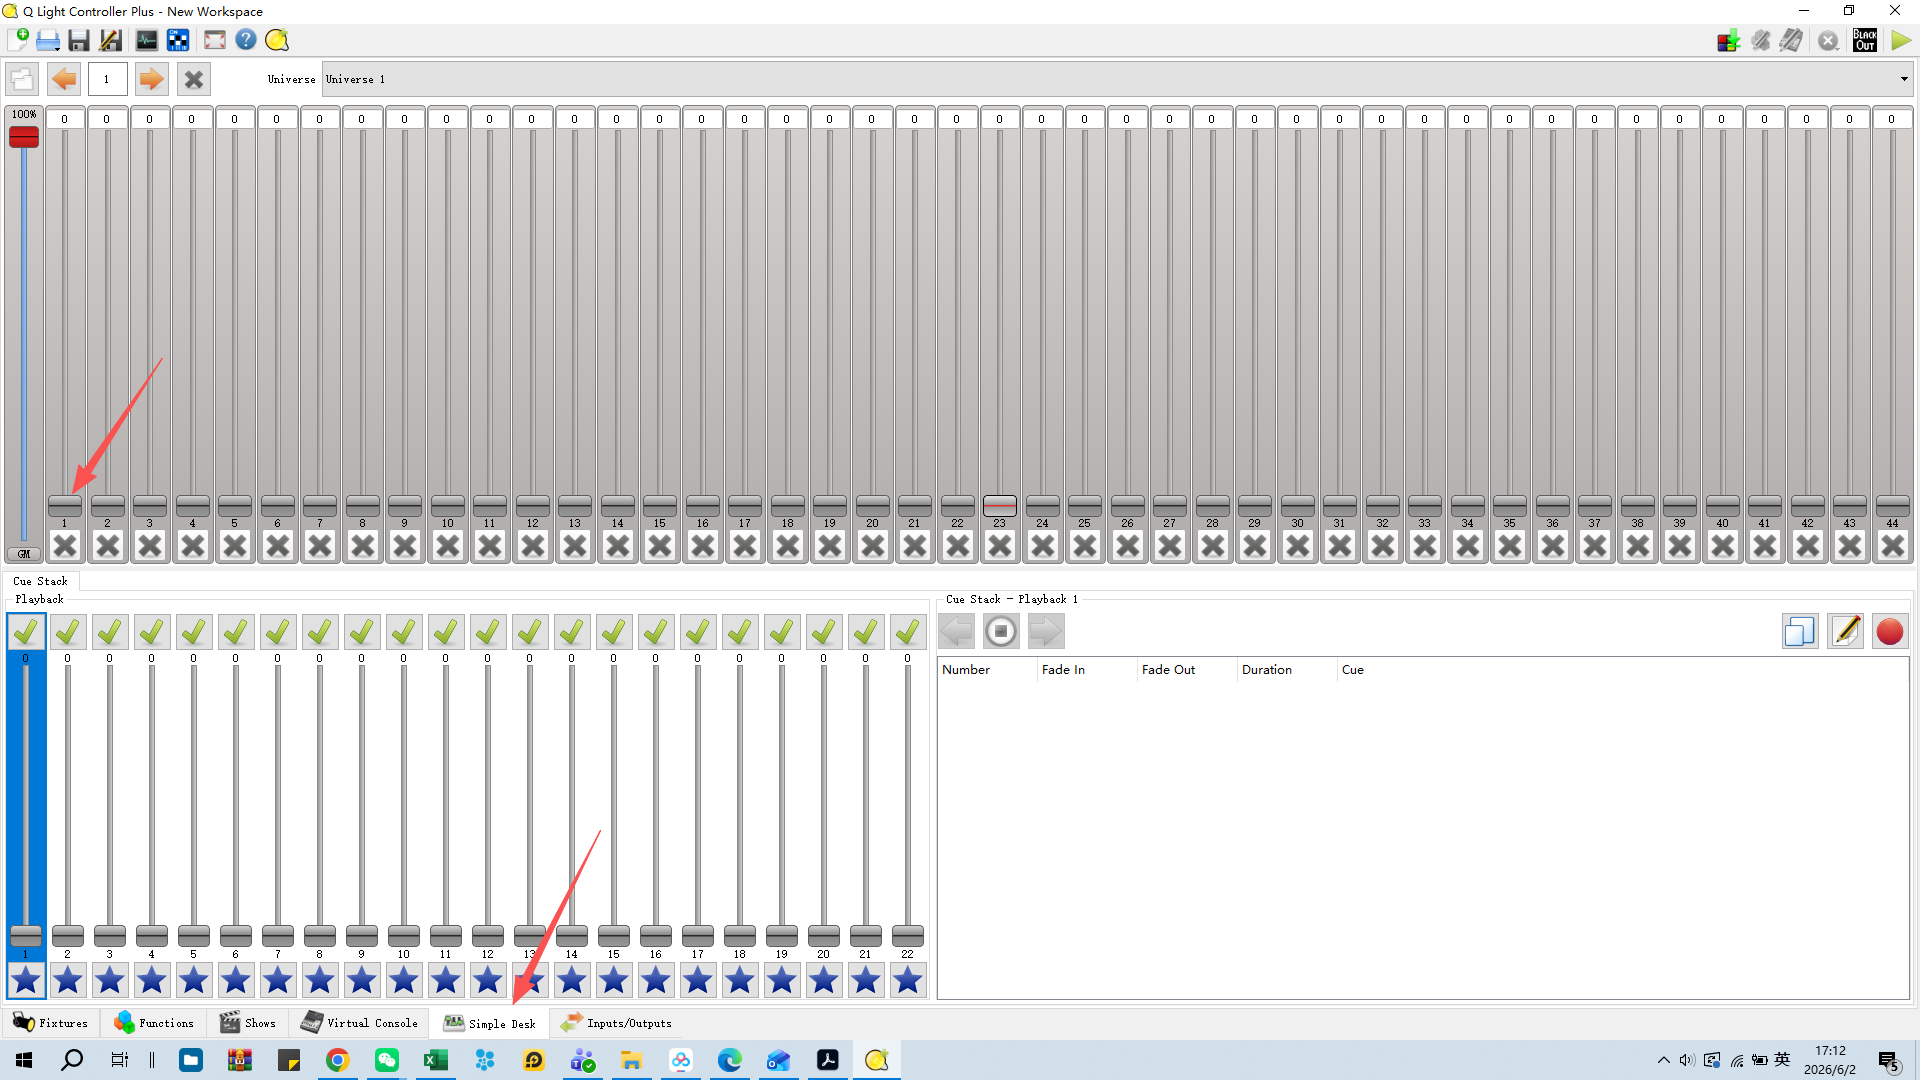
If the device does not appear in QLC+
- Close other lighting software first. Only one program can access the Open DMX USB at a time. If another application has claimed the USB port, QLC+ cannot open it. Close everything else, unplug and re-plug the device, then restart QLC+.
- Check the cable and port. Try a different USB cable (under 1 m) and a different USB port.
- Check the driver. The Open DMX USB communicates through the FTDI driver. If the operating system itself does not detect the device, follow the platform guide: Windows software not recognizing device or macOS software not recognizing device. Both walk through driver checks and reinstallation step by step.