The ELM Scheduler starts your sequences automatically at set times, so an installation can run unattended every day. This guide covers the two parts of the setup: telling ELM where it is in the world, then attaching a schedule to a sequence.
As a worked example, we will make the lights come on at 7:00 PM every day and run for 7 hours.
1. Set your location and enable the Scheduler
In ELM, go to Settings > Scheduler.
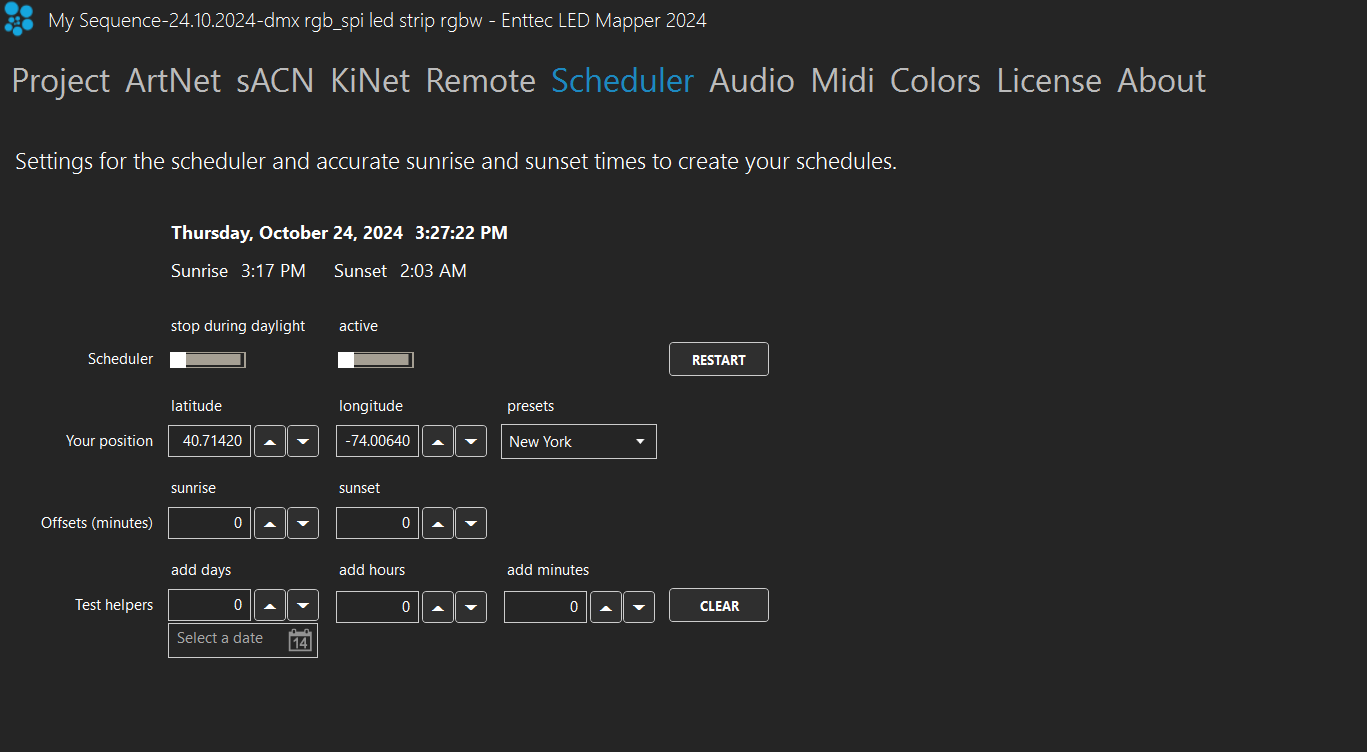
In the Presets drop-down, choose the city closest to your installation. This fills in the timezone and the latitude/longitude coordinates for you. ELM uses these coordinates to calculate local sunrise and sunset times throughout the year, which matters if you later schedule anything relative to sunrise or sunset.

If your city is not in the list, look up its latitude and longitude and enter them manually in the Your Position field.

Make sure the Scheduler itself is activated. This is the master switch: if it is off, no schedule in the project will fire.

2. Create or edit a sequence
The Scheduler plays sequences, so you need one ready before you can schedule anything. Go to Sequences and build the steps and effects you want, or click Edit Sequences to adjust an existing one.
If you are new to sequences, this video walks through building one: How to use ELM Sequences.

3. Schedule the sequence
Open the Schedule tab for the sequence.

Enter the Start Time in 24-hour format (hours, minutes, seconds). For our 7:00 PM example, the hour is 19.

Set Relative to to Midnight. This tells ELM to treat the start time as a plain clock time. The drop-down also offers sunrise and sunset, which is where the location you set in step 1 comes in: "1 hour after sunset" then tracks the seasons automatically.

Enter the Duration in hours, minutes and seconds. For our example that is 7 hours, so the lights stop at 2:00 AM. Alternatively, tick Auto instead of setting a fixed duration.

Set the start and end dates for the period the schedule should be active. The presets cover the common cases: One Day, All Year, Everyday, Weekend and Workweek. You can also tick or untick the individual day-of-week boxes to control exactly which days the schedule runs.

Finally, activate the schedule itself.

That is the whole setup. Once the current date and time match the schedule, ELM starts the sequence on its own and stops it when the duration runs out.
Beyond the Scheduler
The Scheduler is one of several ways to trigger sequences automatically. ELM also supports remote control and triggering over DMX, OSC and HTTP, which can sit alongside or override the schedule. See Remote Management, Control & Triggers for the full list.