ELM 2026 introduces 3D shape import, letting you build a lighting rig in any geometry you can describe and drive it as a standard ELM 3D stage. This article is a step-by-step reference for lighting installers, systems integrators, and architectural lighting designers who want to move beyond ELM's built-in preset shapes.
Overview of the CSV format and required columns
A 3D shape is described in a plain CSV file: one row per LED. ELM reads the file, validates every row, builds the 3D stage, and then treats it identically to any other ELM 3D rig. You can edit the file in Excel, a text editor, or generate it programmatically.
Each row must supply the following columns:
- X, Y, Z — the position of the LED in 3D space. Units can be millimetres, centimetres, or inches; ELM detects the scale automatically and normalises it.
- Pixel type — the emitter configuration for that LED:
RGB,RGBW,RGBA, multi-emitter white, or similar. Each LED can carry its own pixel type; the rig does not need to be uniform. - Bit depth —
8or16bit, per LED. - Protocol —
Art-Net,sACN, orKiNet. A single rig can mix all three. - Universe — the DMX universe number for this LED.
- Start channel — the DMX start channel within that universe.
A minimal sample snippet for three RGB LEDs on Art-Net looks like this:
x,y,z,pixel_type,bit_depth,protocol,universe,start_channel
0,0,0,RGB,8,Art-Net,10,1
0,0,36,RGB,8,Art-Net,10,4
0,0,72,RGB,8,Art-Net,10,7
The DMX patch in the file is used exactly as written. ELM does not reassign addresses; the file must match the rig as physically wired.
How to use Save template
Rather than building the file from scratch, use ELM's built-in template as your starting point:
- Open ELM 2026 and navigate to the 3D stage import dialog.
- Click Save template…
- Choose a location and save the file.
The template is a complete, working CSV with every column filled in with example values and an explanation of each field in the header comments. It is the authoritative reference for column names, accepted values, and ordering. Keep a copy as a reference whenever you write or generate a new shape file.
Using an AI assistant to generate the file
The template's documented format makes it straightforward to hand off to any AI assistant — ChatGPT, Claude, Copilot, or whichever you already use. ELM contains no built-in AI and sends no data anywhere; the assistant runs in your own account and environment.
The workflow is:
- Open the saved template and copy its contents (or paste the header and a few example rows).
- Start a new conversation with your AI assistant.
- Paste the template and describe the rig you want.
- Save the output as a
.csvfile.
Example prompt — Christmas tree
The following prompt produces a cone-shaped tree rig:
Here's the CSV format ELM uses for 3D LED stages.
Generate me a Christmas tree: a cone 1.8 m tall, 1.2 m across the base,
12 vertical runs of 50 pixels, RGB at 8-bit, Art-Net from universe 10,
each run on its own universe.
The assistant will return a CSV with 600 rows (12 runs x 50 LEDs), with X/Y/Z positions distributed around the cone surface, pixel type RGB, bit depth 8, protocol Art-Net, universes 10 through 21, and start channels incrementing by 3 per LED within each universe.
You can refine the shape by continuing the conversation: ask for a denser pixel count toward the apex, move the wiring seam to the rear, or change the height. Each iteration is seconds of work rather than a manual spreadsheet recalculation.
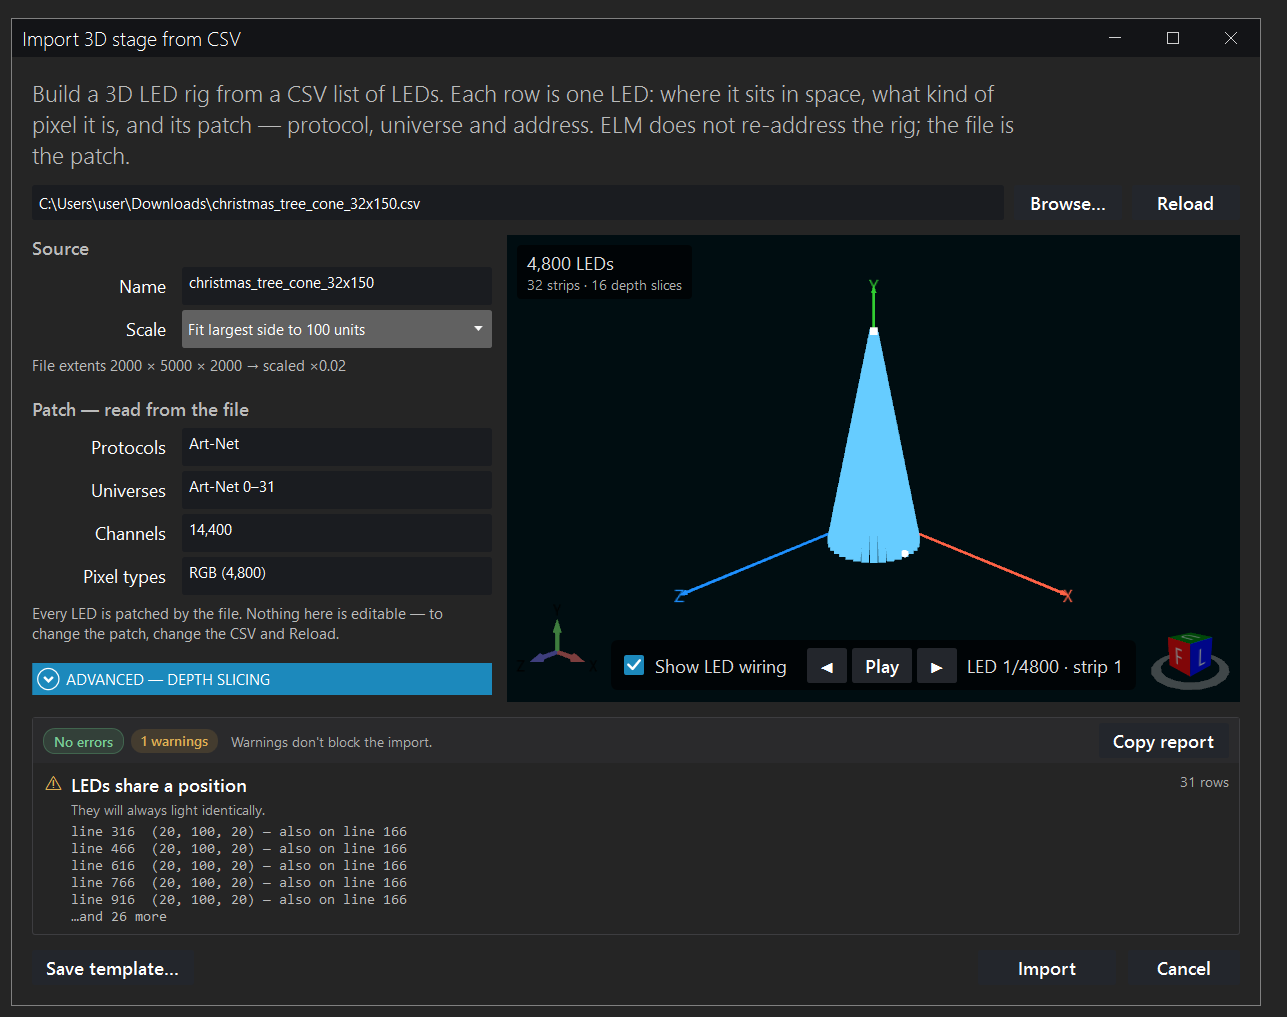
When you have the file, import it into ELM and let the validator run before trusting the output.
Validation
ELM validates every row before it builds anything. No stage is created from a file that contains errors.
What ELM checks
- All required columns are present and correctly named.
- Coordinate values are finite numbers in a consistent unit.
- Pixel type and bit depth values are recognised.
- Protocol values are one of
Art-Net,sACN, orKiNet. - Universe and start channel values are within valid ranges for the selected protocol.
- No two LEDs share overlapping DMX channel ranges on the same protocol and universe.
How to read error messages
The validation panel lists each problem on its own line with the row number from the CSV and a plain-language description of the fault, for example:
Row 47: start_channel 511 — RGB at 8-bit requires channels 511–513, but universe 10 ends at 512.
Row 203: pixel_type value "RGBB" is not recognised. Expected: RGB, RGBW, RGBA, or a valid white variant.
The 3D preview updates in real time as ELM processes the file, so you can see the rig take shape and spot geometric anomalies visually, not just through the error list.
Feeding errors back to the AI assistant
Because error messages are written in plain language and include row numbers, you can paste them directly back into the same AI conversation:
ELM returned these validation errors. Please fix the CSV and return the full corrected file:

Row 47: start_channel 511 — RGB at 8-bit requires channels 511–513, but universe 10 ends at 512.
Row 203: pixel_type value "RGBB" is not recognised. Expected: RGB, RGBW, RGBA, or a valid white variant.
The assistant corrects the identified rows and returns the updated file. This round trip is fast, and ELM's validator is the check that makes it safe to use AI-generated geometry in a real installation.
Import steps and post-import verification
Importing the file
- In ELM 2026, open the 3D stage import dialog.
- Click Browse and select your CSV file.
- The 3D preview renders as ELM reads each row. Review the shape and the wiring path overlay to confirm the geometry matches your intention.
- Review the patch summary: it lists every universe, protocol, and channel range ELM will use. Confirm this matches your controller configuration.
- If the validation panel shows no errors, click Import.
What to verify after import
An imported rig is a standard ELM 3D stage immediately after import. Before running a live show, confirm the following:
- Patch vs. physical rig: ELM uses the DMX addresses from the CSV exactly as written. Walk through the patch summary and verify that every universe and start channel matches the controllers as actually wired on site. ELM cannot detect a mismatch between the file and the physical installation.
- Shape vs. physical rig: Use ELM's built-in test patterns to step through LEDs in order and confirm that the lit pixel in the 3D view corresponds to the correct physical LED. This catches any physical wiring that differs from the geometry described in the file.
- Pixel types: Confirm that each pixel type in the file matches the actual fixture at that position, particularly where the rig mixes RGB and RGBW or 8-bit and 16-bit devices.
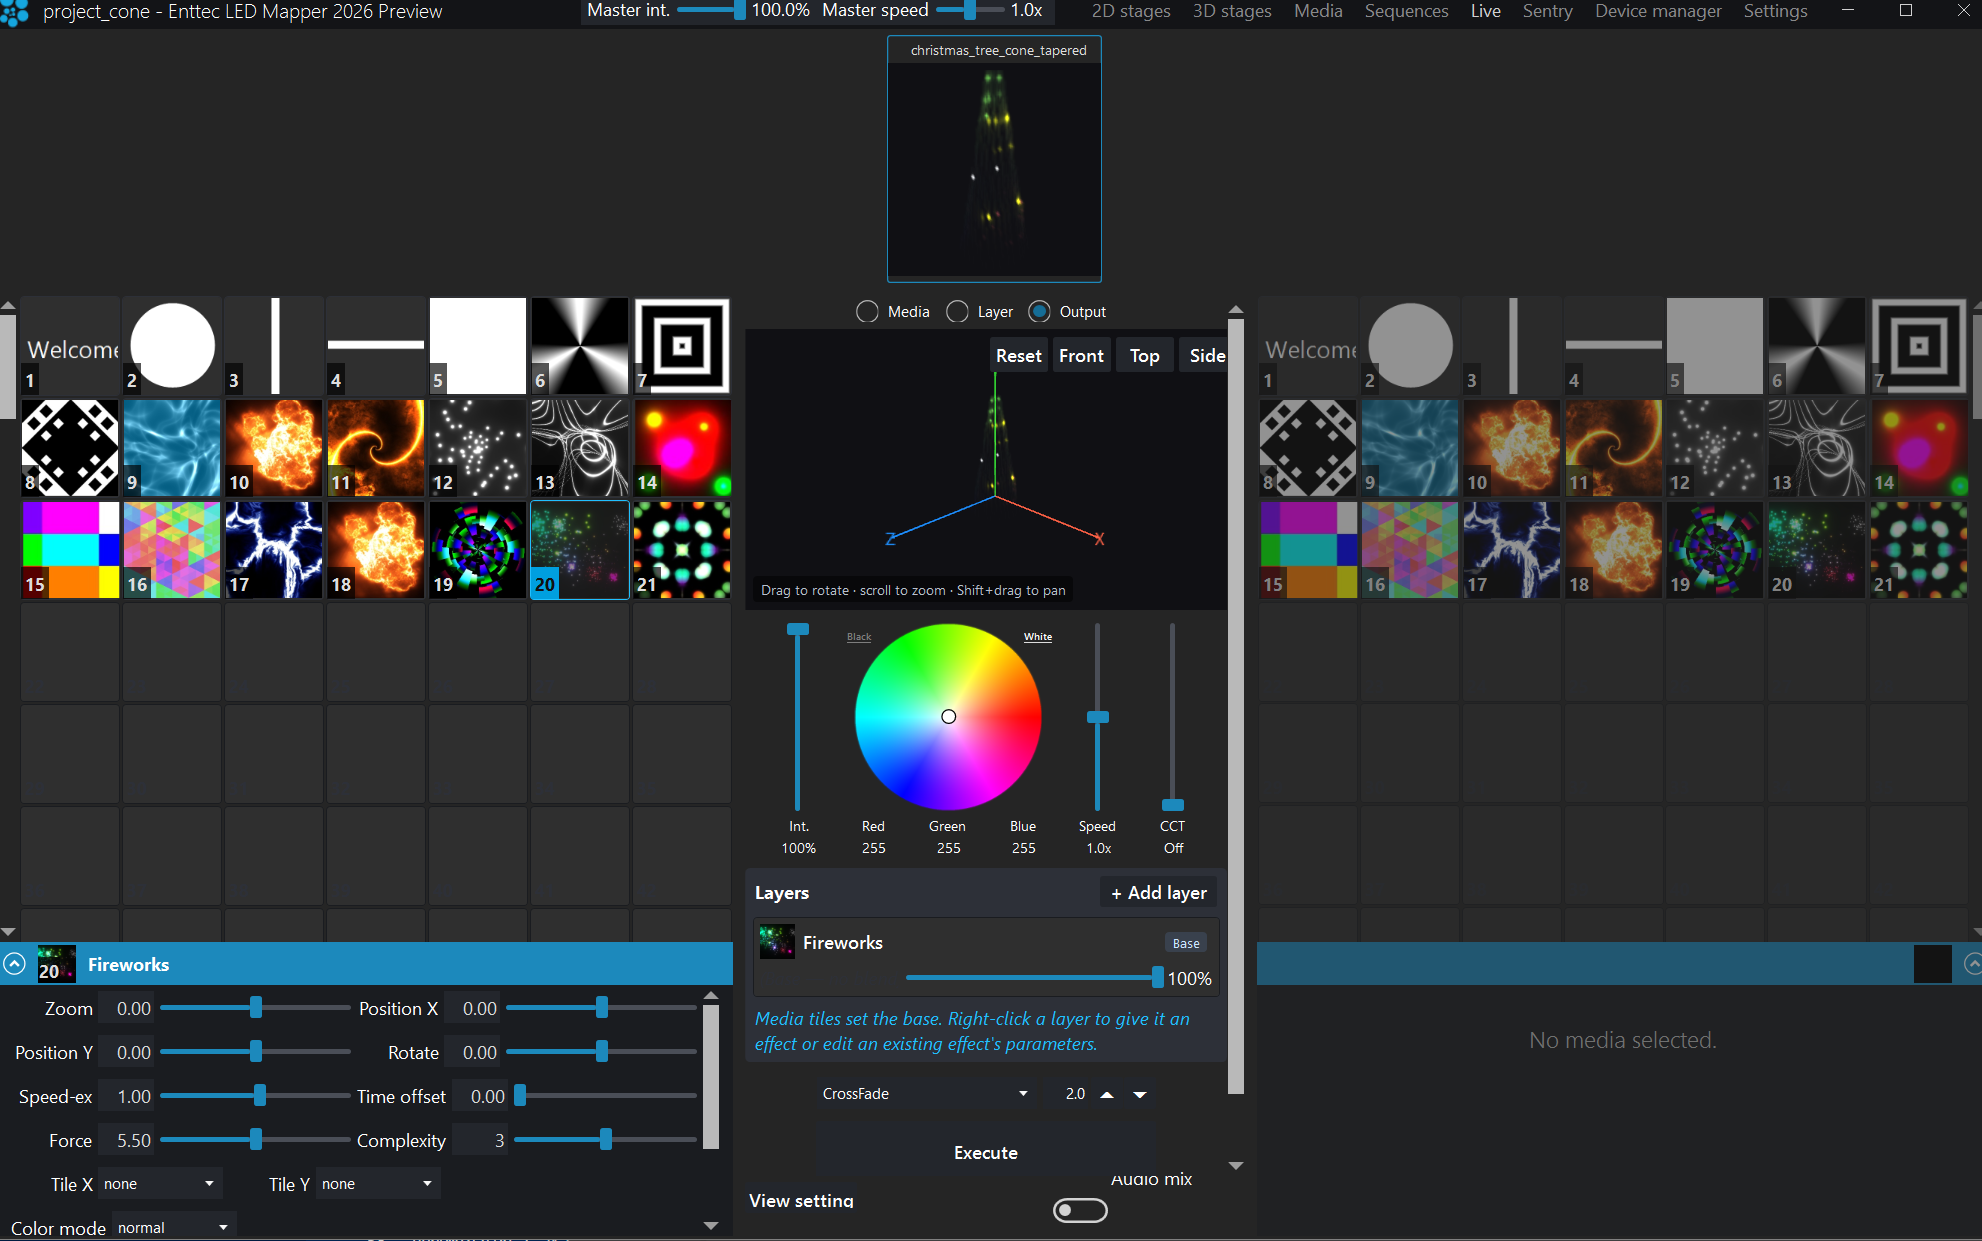
Once verified, the rig supports the full ELM feature set: media playback, effects swept by depth, sequences, live control, and all standard test patterns.
Supported protocols, pixel types, and units
Protocols
- Art-Net
- sACN
- KiNet
A single imported rig can mix all three protocols across different LEDs. Specify the protocol per row in the CSV.
Pixel types
- RGB
- RGBW
- RGBA
- Multi-emitter white variants
Bit depth is set per LED: 8-bit or 16-bit. A rig can contain mixed pixel types and mixed bit depths.
Units
Coordinates can be expressed in millimetres, centimetres, or inches. ELM measures the extents of the rig and scales it automatically; you do not need to convert units before importing. Use whichever unit your source data or AI assistant produces naturally.